A First Look At Entra Private Access
Posted on November 09, 2024
- and tagged as
- entra
This post is going to be a summary of my first look into Entra Id Private Access, Microsoft’s “zero trust” replacement for traditional VPNs. There is a lot of marketing fluff to sift thorough, so I wanted to write this up and keep it mostly technical.
Traditional VPN replacement tech has been in the form of SSL gateways, which are fine if all of your apps are browser based, but if you need access to a SMB share or some other TCP/UDP based internal resource then they’ve always fallen short. This is why I’m excited about Entra Id Private Access, it does support access to all of those internal resources, so it can actually replace your VPN.
Let’s have a look at how it works and what it offers.
Licensing and cost
You can get access to Entra Id Private Access via two paths
- Microsoft Entra Suite for $12.00 user/month (or $18.00 AUD). This includes Entra Id Protection, Entra Id Governance, Entra Verified Id, Entra Internet Access, and Entra Private Access.
- Microsoft Entra Private Access standalone license for $5.00 user/month (or AU$7.50 AUD).
Both require a separate Entra Id P1 or P2 license.
How does it work
An agent is deployed on an internal Windows server that has access to resources you wish to expose. This is the same agent as is used for Azure Application Proxy, but it has been renamed to ‘Microsoft Entra private network connector’.
Another agent is then deployed to endpoints which facilitates the connection.
Initial Configuration
Note - these are not production deployment docs, they’re for a simple lab environment to test the product.
Activate the console
Entra Private Access is managed from the Microsoft Entra Admin Center, under the Global Secure Access dashboard.
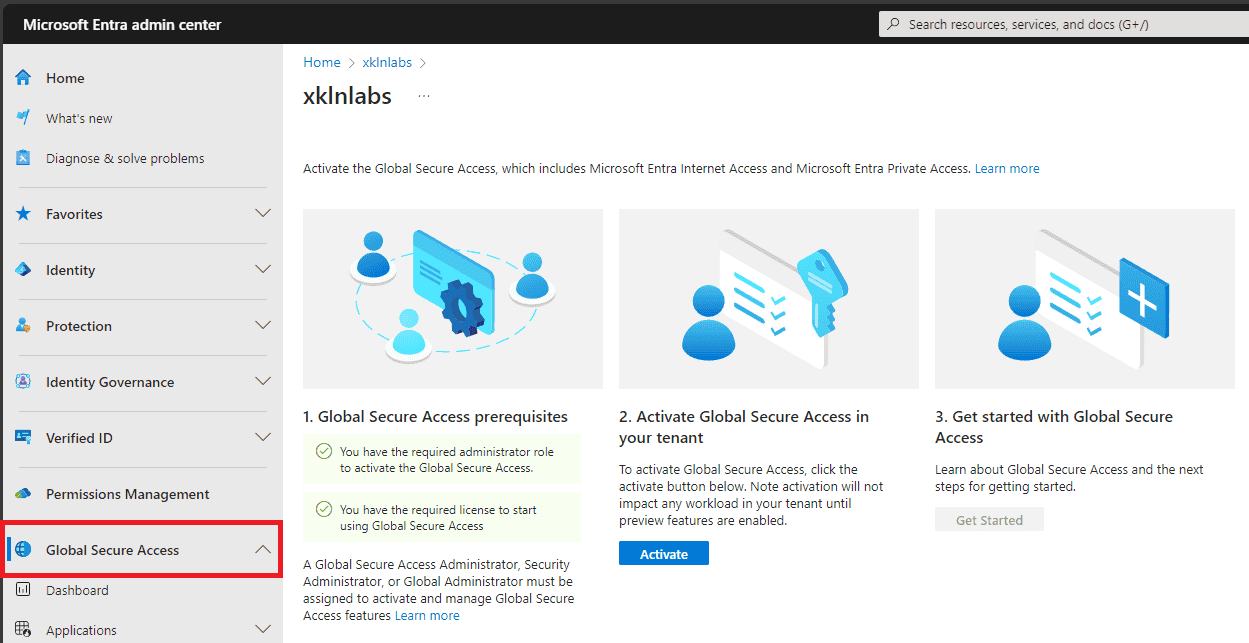
Activation will take a few minutes.
Download and install the connector agent
Navigate to Connect → Connectors → Download connector service.
This has some special configuration requirements
- If using the connector with Microsoft Entra application proxy you’ll need to disable HTTP2.0 on Server 2019 and later
- The server must have TLS1.2 enabled before the connector is installed.
Further details are here.
You can install multiple connectors for high availability.
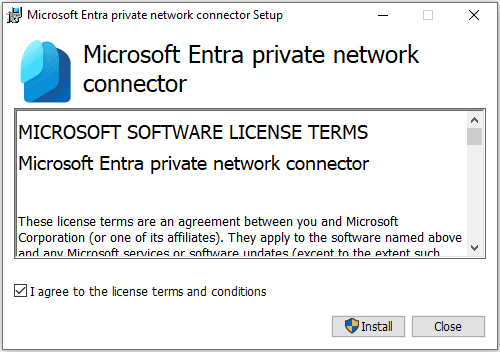
You will be prompted to reboot following installation.
Two ways to access internal resources
There are two options for how to define what internal resources users will have access to.
- Quick Access
- Global Secure Access app
Global Secure Access app allows granular policies to be defined per app, including access to different apps by different, users, different Conditional Access policies, etc. Quick Access are a group of IPs or FQDNs which will always be tunnelled through the service.
You can create both, but your internal resources should not overlap between the two - don’t have the same IP ranges or FQDNs in both.
For this exercise I’ll be using Quick Access.
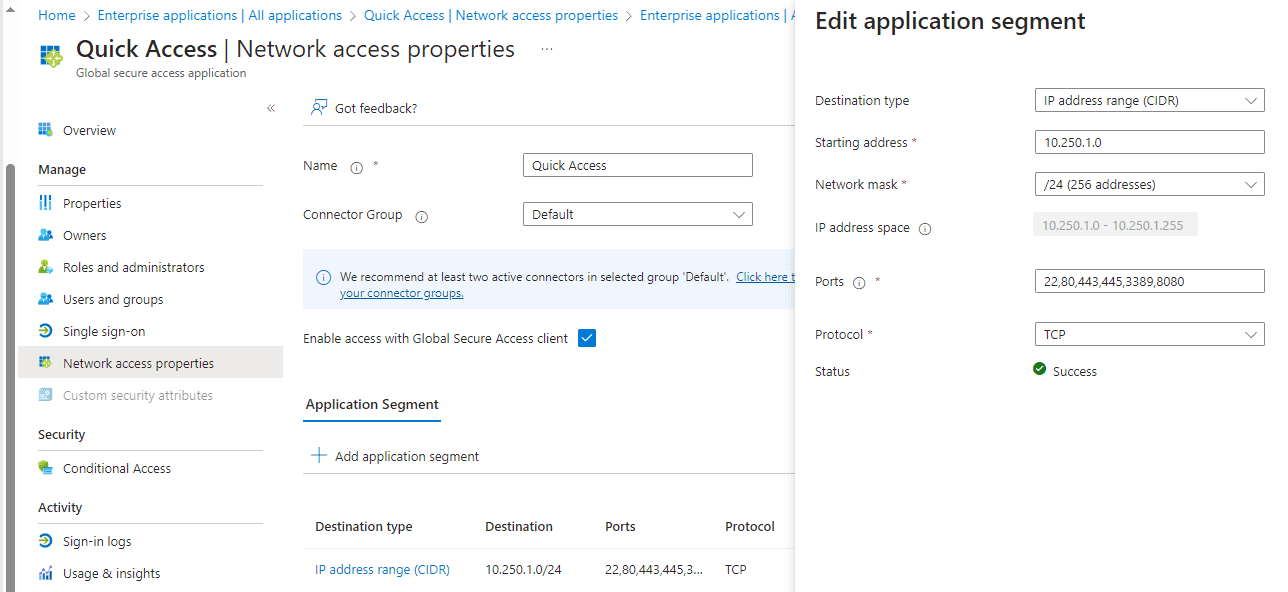
Set up Quick Access
Navigate to Applications → Quick Access. Define a name (Microsoft recommends naming it “Quick Access” 🤷♂️), and create an application segment which will define what internal resources can be accessed. The following will be required
- IP host, IP range, or FQDN
- Ports, either a single port, a comma separated list, or a range
- Protocol(s) - TCP and/or UDP
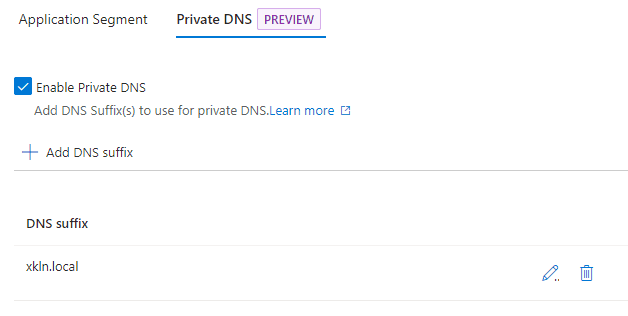
Optionally configure the Private DNS suffixes, this allows your users to access resources using just the base name instead of the whole FQDN.
 .
.
There is also support for SSO using Kerberos, but that is outside the scope here, refer to the documentation.
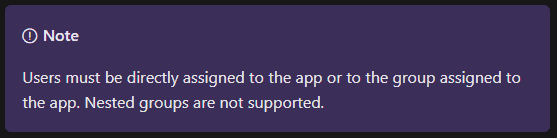
When Quick Access is configured it automatically creates a new Enterprise App. You will need to grant access to users or groups. An important note from the MS docs - nested groups are not supported.
You can optionally apply Conditional Access policies to the Quick Access app.
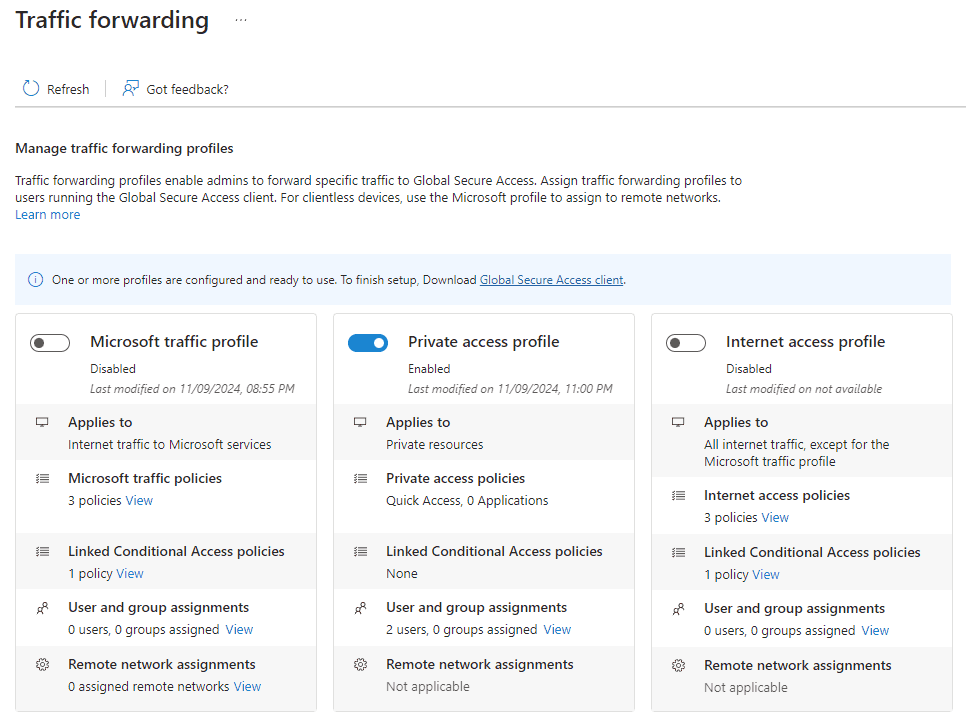
Enable Traffic Forwarding
Lastly, navigate to Connect → Traffic Forwarding, and enable the Private Access Profile, and then assign Users and/or groups to the profile. This will add them to a special group called ‘GSA-Privateaccesstrafficforwardingprofile’.
Install the Global Secure Access client on endpoints
You can download the client from the Connect → Client Download page.
Some of the key device requirements
- Entra joined or hybrid joined; Entra registered devices aren’t supported
- Local admin is required for the installation
- AVD single session and Windows 365 are supported, AVD multi-session is not
The documentation for the client is quite good and contains a lot of important info, including several limitations, rather than repeating most of it here where it will go out of date, I’ll just link to it.
Global Secure Access client registry values
There are two settings which are hidden by default but can be enabled by setting some registry values under HKLM:\\SOFTWARE\Microsoft\Global Secure Access Client.
| Value Name | Type | Description |
|---|---|---|
HideSignOutButton |
REG_DWORD | 0 shows the Sign out option, allowing the user to Sign out and Sign in as a different M365 account. 1 hides the option |
HideDisablePrivateAccessButton |
REG_DWORD | 0 shows the Disable Private Access option, allowing the user two stop tunneling their traffic through Global Secure Access. This is useful for when the user is on the corporate network, or a network with site to site VPN access to the resources they require and tunnelling is not required. 1 hides the option |
Conditional Access
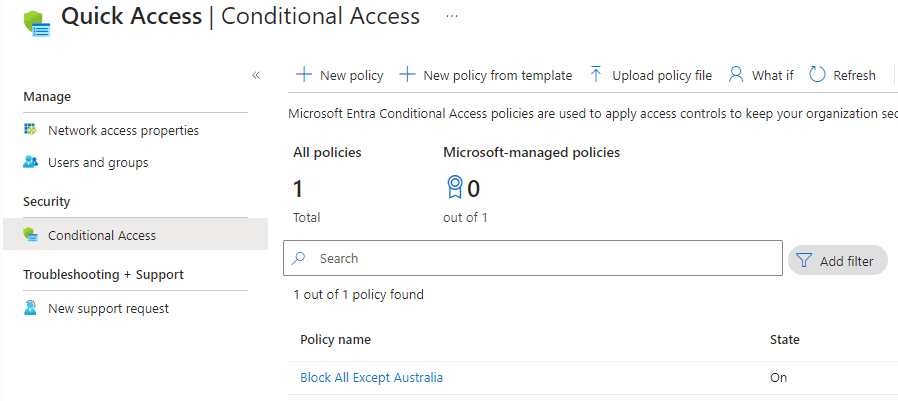
A feature I really like is the ability to configure Conditional Access policies for accessing specific internal resources (or all when using Quick Access). This allows implementing limitations like geofencing or requiring MFA.
Troubleshooting
Client error - Global Secure Access Client - Disabled by your organization
- Ensure you have a traffic profile enabled and the correct user assignments
- Ensure the user is allowed access to the Quick Access Enterprise app (or the Global Secure Access app)
- Ensure the user has the a license
Conclusion and impression
Overall I really like the solution. A few limitations may take some getting used to and will require further investigation, and I need to do more performance testing. Generation of diagnostic data on the agent requires elevation, so it’s not something we’re going to be able to expect end users to provide for us.
The biggest downside I see is the requirement for the device to be Entra Id joined to the tenancy that is being accessed. As per the FAQ:
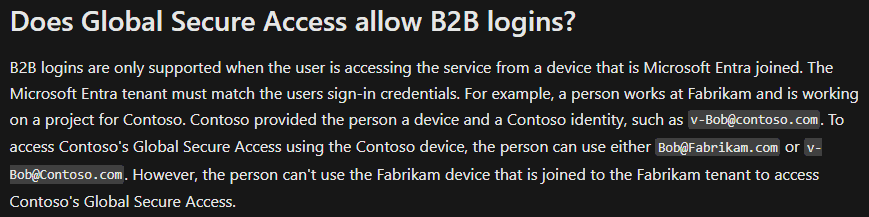
VPNs are often used to provide contractors, vendors, and other external parties access into the environment. Replacing your VPN solution with Entra Private Access will make this more difficult.