Understanding Azure App Registration, Enterprise Apps, And Service Principals
Posted on January 26, 2022
- and tagged as
- azure,
- powershell
If your journey into Azure is anything like mine you started off wanting to write some simple PowerShell automation or reporting, probably for Azure AD or Microsoft 365, and went searching for how to create service accounts. This led you to service principals, which then led you to App Registration and Enterprise Apps, and now you’re super confused because none of it makes sense for your use case.
Much of this confusion comes down to how we’re accustomed to creating service or task accounts in our on-prem Active Directory environments. Typically these would be specially named user accounts with privileges on the systems they needed access to. We’ve been doing things this way for long enough that it has become deeply ingrained and we expect Azure AD to be the same. But it’s not, however, once we understand how Azure AD handles “service accounts” we’ll appreciate the tools they’ve given us to better separate users and identities used by scripts and applications.
It can be challenging taking in new concepts while looking to archive a specific outcome without an understanding of the bigger picture. This post aims to provide that bigger picture and by the end you should be comfortable creating and managing app registrations and service principals for your automation tasks.
Let’s begin.
What is Azure AD App Registration?
App Registration is a way for us to tell Azure AD “hey, I’ve got this thing I want to authenticate and authorize with Azure AD, here is some stuff you need to know about it and here are the things I need to be able to access with it”.
If all we want is the service principal that’s going to allow us to automate running our scripts the only “stuff” we need to provide Azure AD when creating the App Registration is the Display Name. After that we need to create a password or certificate that we’re going to authenticate with, and finally we’ll need to define what permissions we want. The Azure AD features, options and terminology we use to accomplish these tasks are different than we’re used to on-prem, so let’s dig a little deeper so we have a better understanding of what we’re doing.
App Registration is required for anything that we want to integrate with Azure AD, be it a fully fledged mobile or web application where we want users to authenticate using their Azure AD credentials, or a two line PowerShell script. This results in a little bit of configuration option overload as we’re using the same Azure feature (App Registration) for both the full blown application and for our two line script.
When we create a new App Registration in the Azure AD Portal it does two things:
- It creates globally unique application object within our Azure AD tenancy, and
- It creates a local instance of that object, also within our Azure AD tenancy
Let’s cover both of these.
The globally unique object
This is what we see when we navigate to Azure AD > App Registrations. When we say globally unique we mean unique across all of Azure, not just within our tenancy. But why is this necessary? When an app registration is being created we’re given a choice of supported account types.
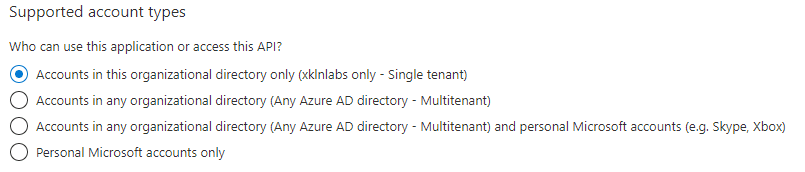
One of the options here is Accounts in any organizational directory, which makes our app accessible to other parties. This isn’t needed for our “service account” as it will only ever be used within our own tenancy but it’s important to know why these objects and options exist. A globally unique object allows our app to be referenced by other Azure AD tenancies.
This object allow us to configure global application settings such as:
- Branding, logos and homepage URLs
- Terms of service and privacy policies
- Authorization redirect URLs to facilitate OAuth2
- Required permissions inside customer Azure environments (similar to how a third party app that hooks into your Twitter/Facebook/etc. requires specific permissions to your account) - here we are building a “third party app” that hooks into Azure AD.
Many of these aren’t required for our automation scripts - they’re there to support more complex applications.
The local instance object
This is what we see when we navigate to Azure AD > Enterprise applications within the Azure portal. Here’s the really good news - Enterprise Apps are the service principals. These are two names that refer to exactly the same thing - the local app object within our Azure AD directory.
Much like the global object allows us to configure global settings, we have the local object to allow us to configure settings which are going to be local to our tenancy and our use of the app. Some examples are:
- Whether the App is enabled for users, and if so, which users
- How consent for the previously requested permissions works (admins can auto-consent on behalf of users, for example)
- Conditional access policies
- Logging and auditing
All of these are are things which don’t make sense to configure globally for an app which may be used by many organisations, so each organisation that uses our app will have their own local object to allow tenant scoped configuration.
When a third party wants to use our app in their environment they only get the local instance created, which then references our global object.

Again, much of this won’t apply to our single tenant automation scripts but it’s good to know.
Now let’s walk through the process of creating an App Registration and associated Enterprise App / service principal using the Azure Portal.
Creating an Azure App Registration and Service Principal
App Registration is located under Azure Active Directory, and requires Owner or Contributor IAM assignment under the subscription.

We’re then given the option to create a new registration.

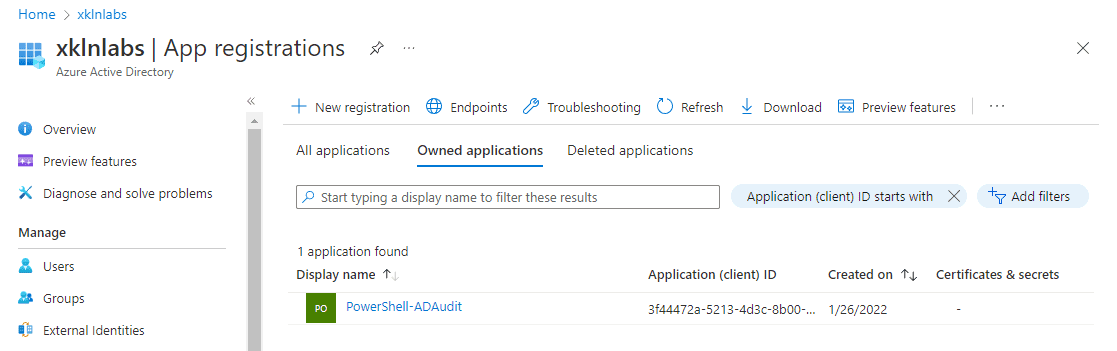
The only required part is the Display Name. Our example app will be for a PowerShell script which will audit our Azure AD directory so we’ll give it an appropriate name.

We can now see our newly registered app.
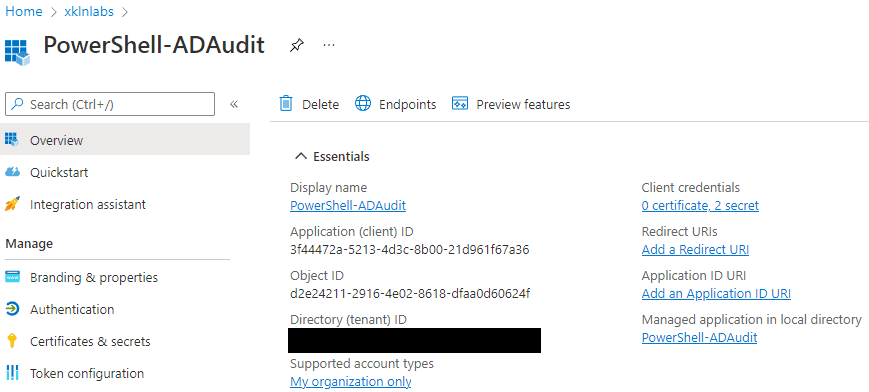
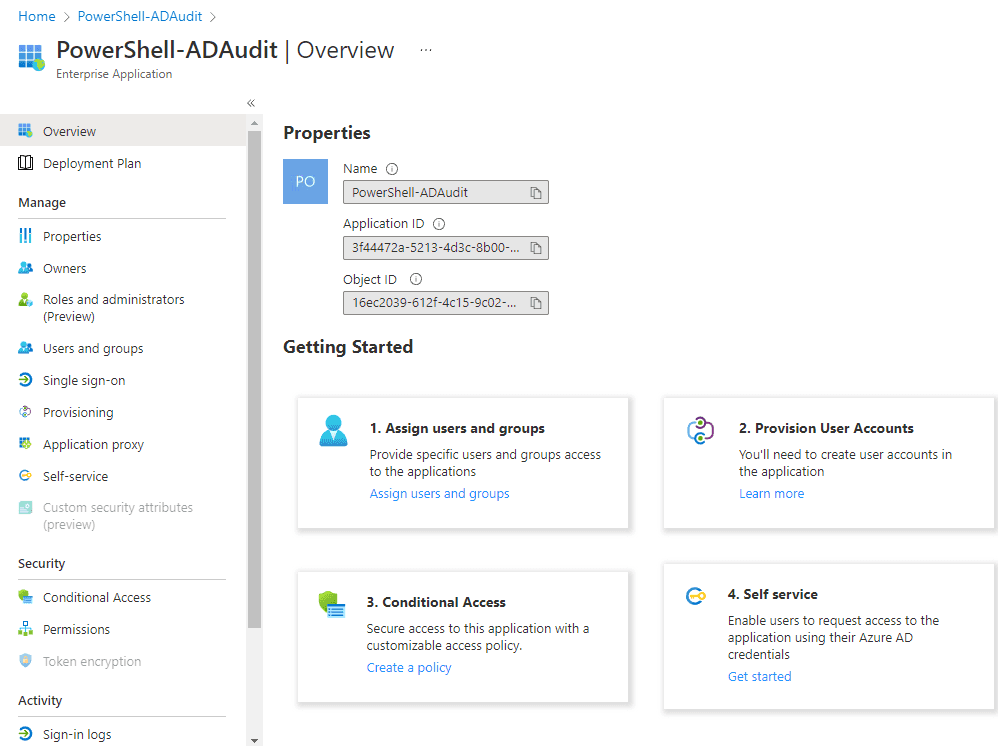
Inside the app we can see some of the global configuration elements we discussed such as Branding on the left menu. The “Managed Application in local directory” link takes us to the Enterprise App / service principal.
We can again see some of the configurable items we discussed - Users and groups, Conditional Access, Sign-in logs, etc.
That’s all we need to do for now. Let’s see the process App Registration and service principal creation with PowerShell.
Creating an Azure App Registration and Service Principal with PowerShell
We’re going to need the Microsoft Az module, so if you don’t already have it go ahead and install it.
Install-Module Az -Scope CurrentUserUnlike using the Azure Portal, when we create the App Registration with PowerShell using the New-AzADApplication cmdlet it doesn’t automatically create the Enterprise App and service principal. However, if instead we directly try to create the service principal, it will automatically create the associated app registration for us.
PS C:\> New-AzADServicePrincipal -DisplayName PowerShell-SPExample

DisplayName          Id                                   AppId
-----------          --                                   -----
PowerShell-SPExample 80f3d7c4-5ddd-4bac-9fe2-85ffe507c380 618a8485-de7f-498e-8ecd-9de03e6761e7
Let’s view both the new SP and App Registration.
PS C:\> Get-AzADApplication -ApplicationId 618a8485-de7f-498e-8ecd-9de03e6761e7

DisplayName          Id                                   AppId
-----------          --                                   -----
PowerShell-SPExample 5ad34c6c-002d-4068-ba86-ab6f6db2d71f 618a8485-de7f-498e-8ecd-9de03e6761e7


PS C:\> Get-AzADServicePrincipal -ApplicationId 618a8485-de7f-498e-8ecd-9de03e6761e7

DisplayName          Id                                   AppId
-----------          --                                   -----
PowerShell-SPExample 80f3d7c4-5ddd-4bac-9fe2-85ffe507c380 618a8485-de7f-498e-8ecd-9de03e6761e7
As we can see, there is no way to separate service principals from App registrations.
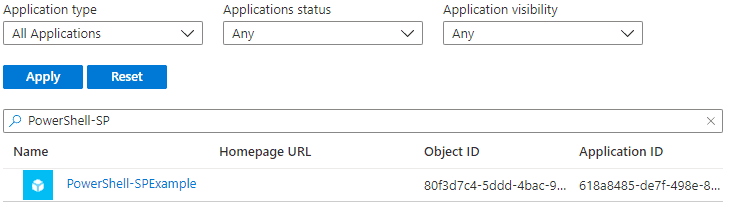
One frustrating thing about creating Service Principals with PowerShell is they’re not visible under the Enterprise Apps filter.

Instead, we need to select “All Apps” and then filter by name.
We also don’t get access access to configuration items such as Conditional Access.
This is due to some missing tags on the Enterprise App object, namely WindowsAzureActiveDirectoryIntegratedApp.
PS C:\> Get-AzADServicePrincipal -DisplayNameBeginsWith "PowerShell" | Select DisplayName, Tag

DisplayName          Tag
-----------          ---
PowerShell-ADAudit   {HideApp, WindowsAzureActiveDirectoryIntegratedApp}
PowerShell-SPExample {}
There is a way to add this via PowerShell but at the time of writing it does not appear to work as expected.
PS C:\> Update-AzADServicePrincipal -ObjectId $ObjId -Tag "WindowsAzureActiveDirectoryIntegratedApp" -ErrorAction Stop
PS C:\> Get-AzADServicePrincipal -ObjectId $ObjId | Select DisplayName, Tag

DisplayName          Tag
-----------          ---
PowerShell-SPExample {}
Neither of these are show stoppers unless we intended to use Conditional Access, and hopefully these issues will be resolved in due course 🙂.
Now that we’ve created our app registration and associated service principal we need to configure them for authentication.
How to use Azure Service Principals As Service Accounts
There are two ways we can authenticate to Azure AD using Service Principals
- A secret (password)
- A certificate
For simplicity I’ll be covering the secret method here, but using a certificate isn’t much more work.
Creating a Secret in the Azure Portal
To create a secret with the Azure Portal we need to navigate to App Registration and then Certificates & Secrets. Once there click Client Secrets followed by New Client Secret.
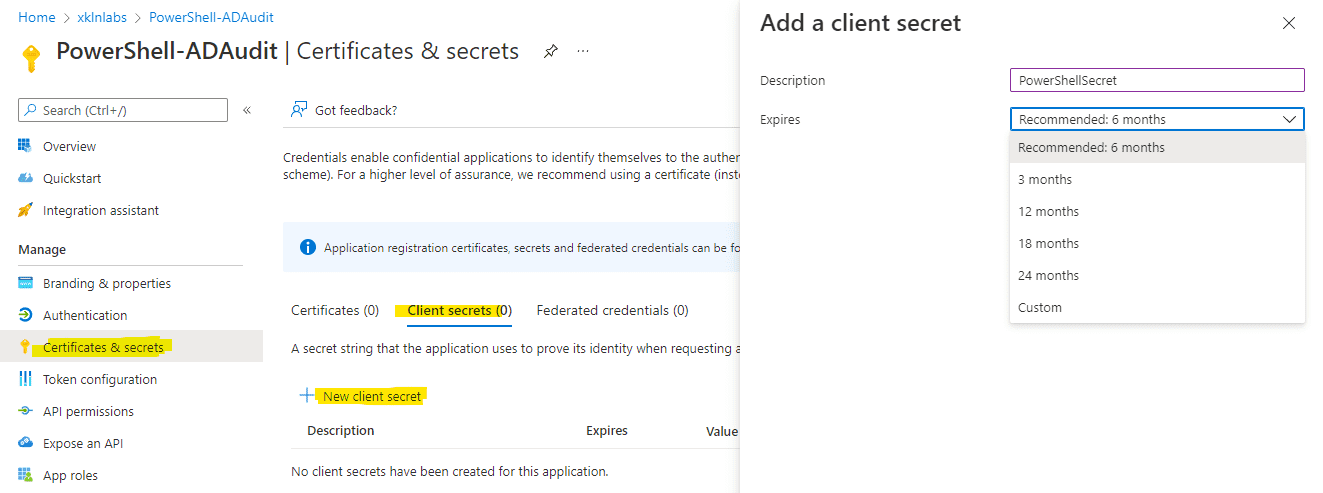
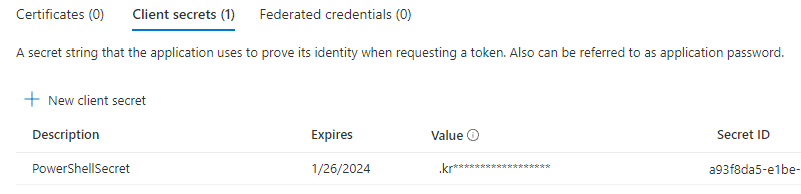
The secret will be auto-generated and will only be shown the first time - you will need to save it to a secure location.
You will have noticed we as also required to specify an expiration date - with the longest period being 24 months. This limit does not apply if we instead use PowerShell to generate the secret.
Creating a Secret with PowerShell
We need to specify many of the same details when using PowerShell, with the one caveat - the description (set with the -CustomKeyIdentifier parameter) needs to be Base64 encoded.
PS C:\> $Description = "CreatedWithPS"
PS C:\> $DescriptionB64 = ([Convert]::ToBase64String([System.Text.Encoding]::Unicode.GetBytes($Description)))
PS C:\> $ObjId = Get-AzADApplication -DisplayName "PowerShell-ADAudit" | Select -ExpandProperty Id
PS C:\> $Secret = New-AzADAppCredential -ObjectId $ObjId -StartDate (Get-Date) -EndDate ((Get-Date).AddYears(10)) -CustomKeyIdentifier $DescriptionB64
PS C:\> $Secret
CustomKeyIdentifier DisplayName EndDateTime Hint KeyId SecretText StartDateTime
------------------- ----------- ----------- ---- ----- ---------- -------------
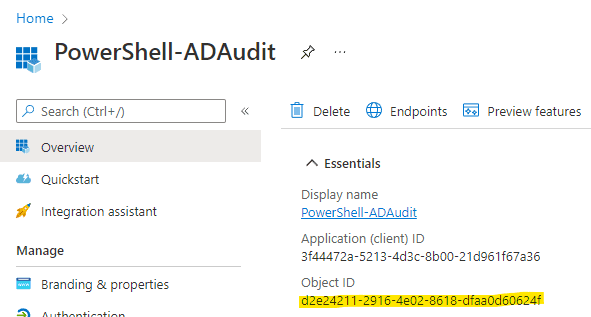
{67, 0, 114, 0...} 26/01/2032 1:37:51 PM Qj_ a893a847-f55c-4545-a3f9-82c024c1bff3 Qj_7Q~pbvcb7iE~CZ-BJ4XDf8htuq6_n8Vi6d 26/01/2022 1:37:51 PMThe $ObjId variable here references the Object Id of the App Registration.
We now have everything we need, let’s put it to use.
Using a Service Principal with PowerShell
PS C:\> $Cred = Get-Credential # Username = Application (client) ID, Password = Generated Secret
PS C:\> $TenantId = "Your Azure AD Tenant Id"
PS C:\> Login-AzAccount -Tenant $TenantId -Credential $Cred -ServicePrincipal

WARNING: The provided service principal secret will be included in the 'AzureRmContext.json' file found in the user profile ( C:\Users\md\.Azure ). Please ensure that this directory has appropriate protections.
Here I’ve used Get-Credential for simplicity, but for a real script you would use whichever secret management system you have in place.
As we’ve successfully logged in with our service account let’s run some commands.
PS C:\> Get-AzADUser | Select -Last 1 | Select DisplayName
Az.MSGraph.internal\Get-AzADUser : Insufficient privileges to complete the operation.
At C:\Users\md\Documents\WindowsPowerShell\Modules\Az.Resources\5.2.0\MSGraph.Autorest\custom\Get-AzADUser.ps1:210 char:9
+         Az.MSGraph.internal\Get-AzADUser @PSBoundParameters
+         ~~~~~~~~~~~~~~~~~~~~~~~~~~~~~~~~~~~~~~~~~~~~~~~~~~~
    + CategoryInfo          : InvalidOperation: ({ ConsistencyLe...= , Expand =  }:<>f__AnonymousType3`7) [Get-AzADUser_List], Exception
    + FullyQualifiedErrorId : Authorization_RequestDenied,Microsoft.Azure.PowerShell.Cmdlets.Resources.MSGraph.Cmdlets.GetAzADUser_List
Not so fast, by default we’re not going to have much access - let’s fix that.
Permissions and Role Assignments
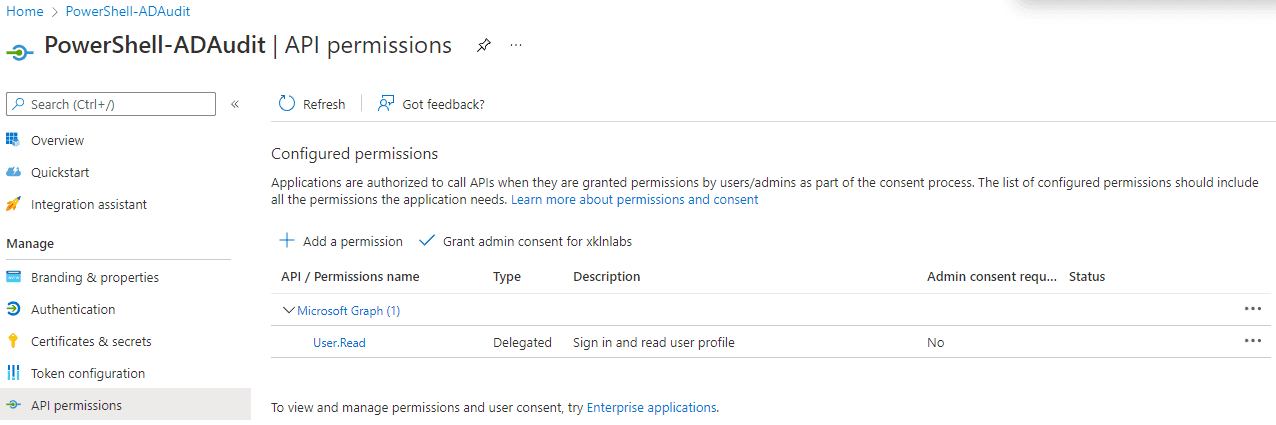
If you recall earlier on we discussed that requesting permissions was done via the global App object, so we navigate to that, and then to API Permissions.
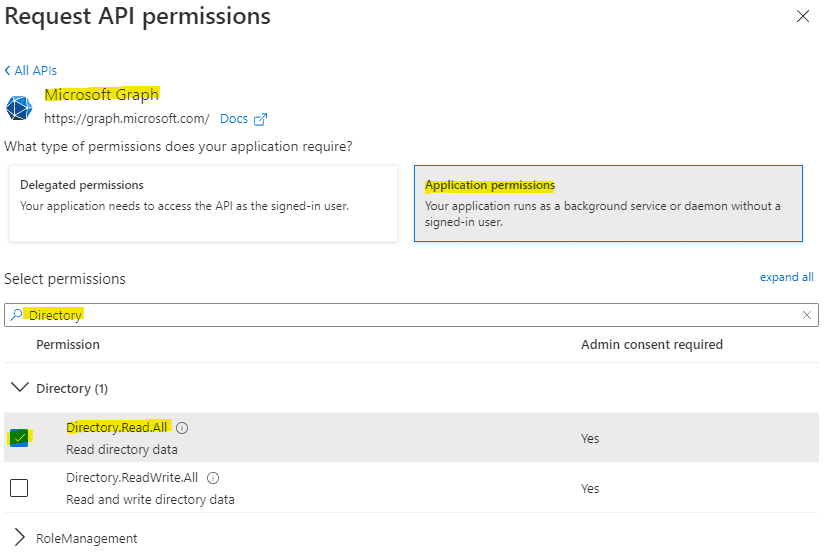
We then add permissions for Microsoft Graph > Application Permissions > Directory > Read.
Once added the permissions will be requested, but not granted (approved) for use in our tenancy. This is a two step process because everything is happening within our own tenancy. In a scenario involving a multi tenant application, the developer would set requested permissions in their own tenancy on the global app object, and the third party using the app would approve them in their Azure AD tenancy under the Enterprise App (either approved by each user, or auto-approved by an admin).

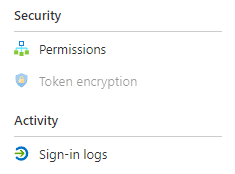
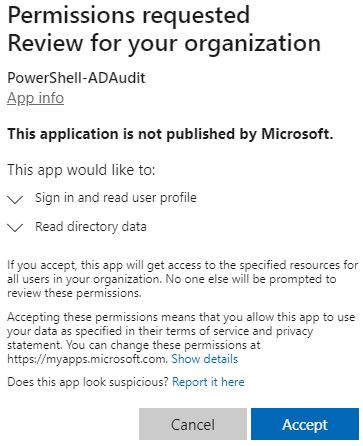
Once again you may recall approvals are done in our local object - the Enterprise App/service principal. Let’s navigate there and then to Permissions. Hit the Grant admin consent for <tenantname> button.
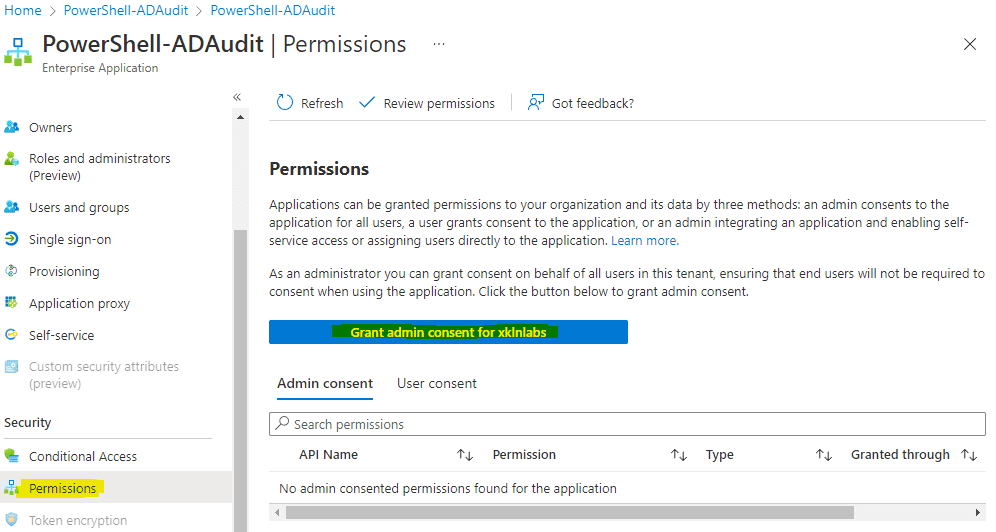
We’re then shown a list of the access our app is requesting and can approve it.
If we now return to our App Registration object we can see the permissions have been approved.

The permissions take effect almost instantly, we do not need to re-authenticate or start a new session.
PS C:\> Get-AzADUser | Select -Last 1 | Select DisplayName

DisplayName
-----------
zUser5
Thats it! While this post is a little long the actual process to create a service principal is only a few clicks in the portal or a couple of PowerShell commands. We get the benefit of having an object separate from our user accounts where we can easily define granular access levels.